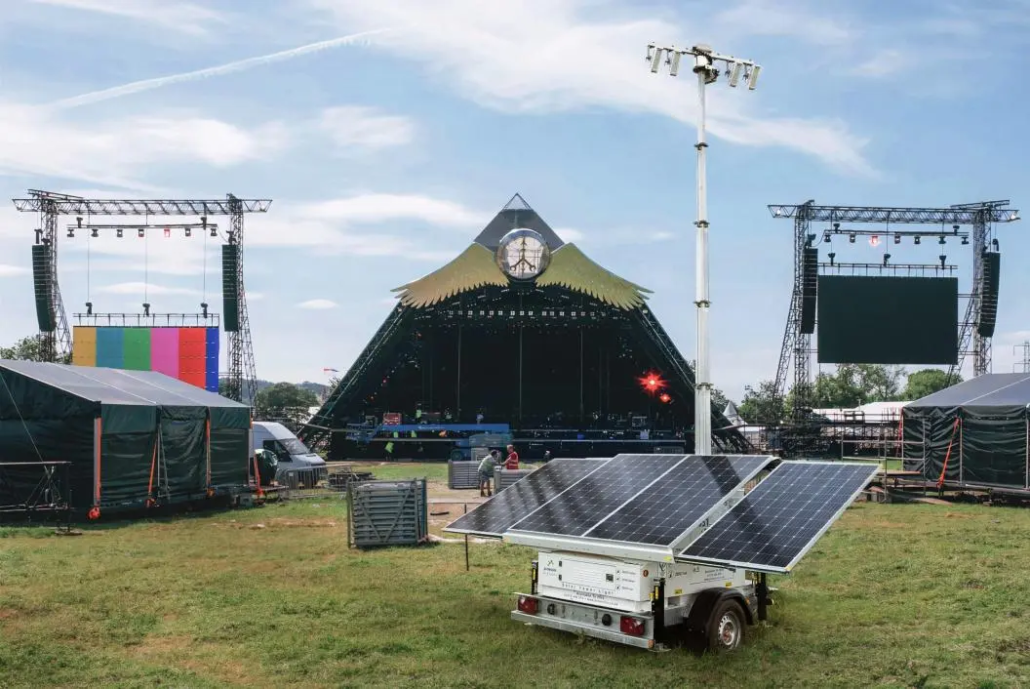
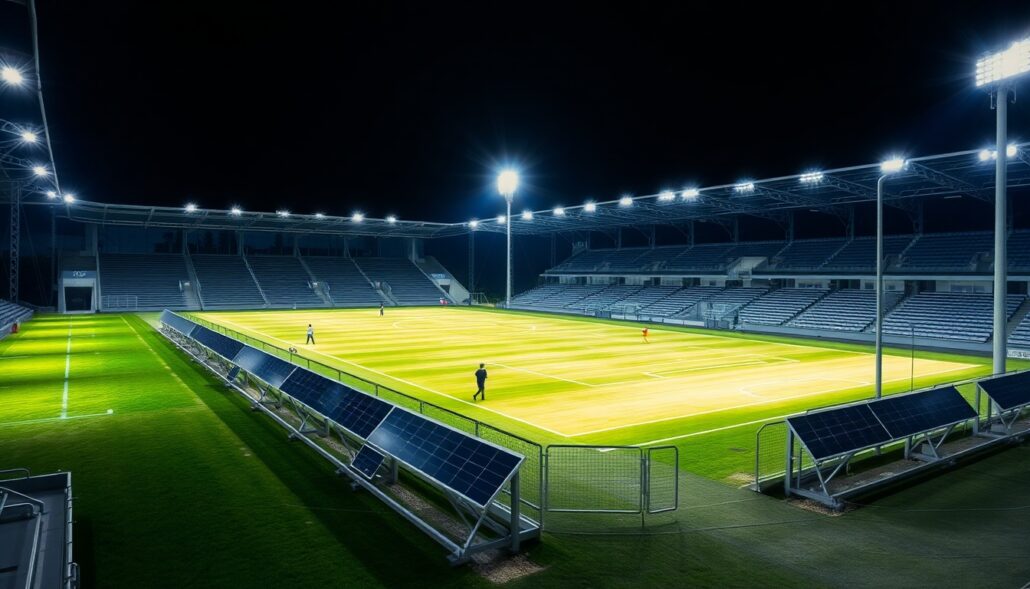
éclairage solaire

La logique sous-jacente de l'éclairage routier urbain : comprendre comment, pourquoi et où la lumière est projetée

1. Introduction

Outdoor lighting design is a complex discipline that surpasses simple spatial illumination; it profoundly influences public safety, visual comfort, energy consumption, and the natural environment. Precisely controlling and distributing light is key to achieving these multifaceted goals. This article aims to provide a comprehensive analysis of key light distribution concepts—particularly cutoff fixtures (including full cutoff, cutoff, and semi-cutoff), non-cutoff fixtures, and batwing distributions—while strictly comparing them to established standards for street lighting in North America (primarily defined by the Illuminating Engineering Society of North America (IESNA)). By dissecting the technical definitions, characteristics, and typical applications of each type, this article will clarify the distinctions and synergies between them, offering valuable insights for professionals in urban planning, civil engineering, and lighting design to develop sustainable, compliant, and high-quality outdoor lighting solutions.

2. Understanding Cutoff Classification of Fixtures

The cutoff classification of fixtures defines the extent to which light is emitted above the horizontal plane, playing a crucial role in managing light pollution, glare, and light trespass. These classifications, historically defined by the Illuminating Engineering Society (IES), provide a framework for controlling upward light emissions.

2.1. Full Cutoff Fixtures

The light distribution of full cutoff fixtures is defined by two strict standards: first, the light intensity (candelas) at the nadir (directly below) at 90 degrees or above is zero, indicating that the fixture does not emit any light directly upwards 1. Second, the candela value at a vertical angle of 80 degrees or above per 1000 lumens of bare lamp does not exceed 100 (i.e., 10%) 1. These limits apply to all lateral angles around the fixture.

Full cutoff fixtures are designed to direct all light downward, thereby effectively minimizing skyglow (the brightening of the night sky) and light trespass (unwanted light spilling onto adjacent properties) 5. This characteristic makes them key to complying with dark sky regulations and preserving nighttime environments. Additionally, by strictly controlling high-angle light, they significantly reduce direct glare, enhancing visual comfort and safety for drivers and pedestrians 6. Their efficiency at precisely directing light only where illumination is needed also assists in energy conservation 6. Thus, many local regulations and environmental standards across North America mandate or strongly recommend the use of full cutoff fixtures 5.

Full cutoff fixture example

2.2. Cutoff Fixtures

The light distribution of cutoff fixtures is defined by specific candela limits: the candela value at a vertical angle of 90 degrees does not exceed 25 (2.5%) 2. At the nadir, the candela value at a vertical angle of 80 degrees does not exceed 100 (10%) 2. These limits apply to all lateral angles. While a small amount of light is allowed above 90 degrees, cutoff fixtures still significantly control upward light compared to semi-cutoff or non-cutoff fixtures, thereby assisting in reducing light pollution.

Cutoff fixture example

2.3. Semi-Cutoff Fixtures

Semi-cutoff fixtures have looser restrictions on upward light: the candela value at a vertical angle of 90 degrees does not exceed 50 (5%) 2. At 80 degrees, the candela value does not exceed 200 (20%) 2. These limits apply to all lateral angles. Compared to full cutoff or cutoff fixtures, semi-cutoff fixtures emit more light at high angles, increasing the potential for glare and skyglow. They are generally not recommended for environmentally sensitive areas or situations requiring strict control of light pollution.

Semi-cutoff fixture example

2.4. Non-Cutoff Fixtures

Non-cutoff fixtures are characterized by the absence of light intensity (candelas) restrictions above their maximum candela region 2. These fixtures emit light in all directions, including significant amounts directly upwards and horizontally. This lack of control leads to severe light pollution (skyglow), substantial light trespass into adjacent properties, and often produces uncomfortable glare 9. Due to growing environmental concerns and regulatory efforts to control light pollution, their use is increasingly restricted or prohibited in many jurisdictions 6.

Non-cutoff fixture example

The evolution from non-cutoff to full cutoff fixtures represents a thoughtful advancement in lighting engineering and regulatory framework aimed at mitigating the negative impacts of outdoor lighting. This trend emphasizes the growing importance of environmental responsibility and enhancement of visual quality in modern lighting design. Unrestricted light (characteristic of non-cutoff fixtures) leads to issues such as glare, light spillage onto adjacent properties, and widespread light pollution 9. Conversely, stricter cutoff classifications, like full cutoff, are engineered to address these issues, aiming to “reduce light pollution,” “minimize skyglow,” “reduce glare,” “enhance visual comfort,” and “increase energy efficiency” 5. This evolution in classification is a direct response from the industry and regulatory bodies (such as the International Dark-Sky Association and IES RP-33) to the recognition of light pollution and glare as significant issues, driving and establishing stricter standards to promote more responsible and sustainable lighting practices. It indicates that lighting design has shifted from merely providing illumination to offering “high-quality” lighting that considers its broader environmental and human impacts.

It is noteworthy that the traditional cutoff classification system is being replaced by the BUG (Backlight-Uplight-Glare) rating system 3. This transition marks a movement towards a more detailed, comprehensive, and actionable approach to assessing lighting performance, recognizing that uplight is only one component of light pollution and trespass. The traditional cutoff system primarily focuses on the emission of light at angles above 80° and 90° (uplight). However, the BUG rating divides spherical light distribution into three different zones: “Up,” “Front,” and “Back,” quantifying the amount of light in each zone 3. This means it evaluates not only uplight but also light spill to the back (backlight, leading to trespass) and glare (light emitting at high angles forward and potentially causing discomfort). This shift illustrates that controlling uplight, while important, is insufficient for achieving truly comprehensive and responsible outdoor lighting. Backlight can lead to significant light trespass onto nearby properties, and glare directly affects visual comfort and safety. The BUG rating offers a more comprehensive and nuanced framework for designers and regulators to address all major forms of light pollution and disturbances. This allows for more precise selection and design of fixtures, leading to better overall lighting quality, enhanced safety, and improved environmental management through a transition from a simple pass/fail system to a graded, multi-dimensional assessment.

Table 1: Comparison of Cutoff Fixture Classification Characteristics

Classification Type

Candela Limit at 90° (per 1000 bare lamp lumens)

Candela Limit at 80° (per 1000 bare lamp lumens)

Primary Features / Uplight Control

Relevant Impacts

Full Cutoff

0 1

Not exceeding 100 (10%) 1

Zero uplight

Excellent dark sky compliance, minimal glare, minimal light pollution

Cutoff

Not exceeding 25 (2.5%) 2

Not exceeding 100 (10%) 2

Very little uplight

Good glare control, reduced skyglow

Semi-Cutoff

Not exceeding 50 (5%) 2

Not exceeding 200 (20%) 2

Moderate uplight

Potential for glare and light trespass

Non-Cutoff

Unrestricted 2

Unrestricted 2

No uplight restrictions

High risk of light pollution and glare

3. Batwing Distribution

Batwing distribution represents a unique optical design strategy aimed at optimizing light quality and uniformity within the illuminated area. Unlike cutoff classifications that control uplight or the IESNA types that define the overall shape of light on surfaces, batwing distribution focuses on the uniformity of illumination.

3.1. Definition and Unique Profile

Batwing distribution is characterized by its ability to produce exceptionally uniform light output over a wide beam angle range 12. Its name “batwing” derives from the unique light intensity profile shape which resembles a bat’s wings when plotted on a polar graph, showing two peaks of intensity on either side of the nadir 12.

This unique distribution is typically achieved through the integration of specially designed diffusers or advanced optical elements within the fixture. These optical components work by breaking down the light emitted from LED sources into a series of small, evenly spaced beams. This engineered diffusion process transforms the more common “hotspot” distribution (where light is brightest in the center and fades quickly towards the edges) into a significantly more uniform light output 12. Additionally, some batwing designs utilize optical films to achieve “double-angle-bent light intensity” to meet specific illumination needs 13.

3.2. Advantages and Applications

Batwing distribution has several significant advantages over traditional light patterns:

  • More uniform light output: It ensures consistency in illumination levels across the entire beam angle range, minimizing changes in brightness and reducing the occurrence of dark spots 12.

  • Reduced hotspots: By eliminating concentrated areas of light, batwing distribution alleviates visual discomfort and creates a more aesthetically pleasing lighting environment 12.

  • Improved visual comfort and glare-free environment: The even distribution of light significantly reduces strong contrasts and direct glare, providing users with a more comfortable and ergonomic visual experience 12.

  • Increased productivity and mood: Studies show that comfortable, glare-free, and uniform lighting environments can positively influence user productivity and overall well-being across various settings such as offices, retail spaces, classrooms, and libraries 12.

Batwing distribution is an excellent choice for a wide range of applications requiring uniform, glare-free conditions:

  • Commercial and industrial spaces: Offices, retail environments, classrooms, and libraries benefit from shadow-free and hotspot-free lighting, enhancing focus and reducing eye strain 12.

  • Residential lighting: It helps create a more comfortable and warm atmosphere in homes.

  • Indirect lighting: Particularly effective when used with suspended indirect fixtures, light is directed to the ceiling to indirectly illuminate the space. This creates a broad, uniform pattern of reflected light, further enhancing uniformity and reducing direct glare 12.

Batwing distribution is an optical design feature that can be integrated into fixtures rather than being an independent classification system like cutoff or IESNA types. It addresses light quality and uniformity within the illuminated area, serving as a complementary function to broader classification systems. This distinction is crucial: batwing is not a replacement for IESNA or cutoff classifications but rather a sophisticated optical engineering solution that can be integrated into fixtures meeting specific cutoff and IESNA requirements. For example, a full cutoff fixture designed for a parking lot (e.g., IESNA Type V) may utilize batwing optical elements to ensure an evenly bright circular light pattern throughout the area without uncomfortable hotspots. This highlights that effective lighting design involves multiple overlapping considerations: controlling spill light (cutoff), shaping the illuminated area (IESNA), and optimizing light quality within that area (batwing).

The development and adoption of batwing distribution reflect a design philosophy that has transcended simply quantitative illumination (e.g., achieving a certain illuminance level), prioritizing qualitative aspects of lighting such as visual comfort and overall user experience. This marks a maturation of lighting design, where human factors are increasingly integrated into technical specifications. Traditional lighting design focused primarily on achieving minimum illuminance levels. However, “hotspots” and “glare” are recognized as issues leading to “discomfort and fatigue,” “visual strain,” and the creation of “uninviting” environments. The advantages of batwing (uniformity, glare reduction, enhanced productivity) directly address these qualitative deficiencies 12. This indicates a shift in priorities in lighting design. While meeting quantitative light levels remains important, there is a growing awareness that the “quality” of light distribution—how evenly and comfortably light is delivered—is equally vital for human well-being, task performance, and overall satisfaction in lighting spaces. This represents a more comprehensive, human-centered approach to lighting design.

4. North American Street Lighting Standards: IESNA Classifications

The Illuminating Engineering Society of North America (IESNA) has developed a fundamental classification system that prescribes how light is distributed on horizontal surfaces, which is critical for the design of roads, parking lots, and other outdoor areas across North America. This system provides a standardized language for describing fixture performance.

4.1. Overview of IESNA Classification System

The IESNA classification system is primarily based on the shape and extent of the lighting area produced by the fixture 8. It provides essential guidance for the design and installation of various outdoor lighting systems, including roads, sidewalks, and parking lots 8. The classification determines light distribution by measuring where most of the light falls on a standardized grid, emphasizing points of highest and 50% candela intensity (light intensity distribution). The system considers both lateral light distribution (across the road) and vertical light distribution (along the road direction) 8.

The comprehensive standard for lighting on roads and parking facilities in North America is ANSI/IES RP-8 (Recommended Practice for Roadway and Parking Facility Lighting). This document compiles numerous previous independent standards from IES and provides detailed guidance on design, maintenance, energy efficiency, environmental impact, and safety for various roadway and pedestrian applications 11.

4.2. Lateral Light Distribution Types (Type I, II, III, IV, V, VS)

These classifications define how light is laterally distributed along a road or lighting area, characterized by the point where the fixture reaches 50% of its light intensity 8.

  • Type I:

  • Characteristics: Provides a narrow symmetrical or asymmetrical elliptical light pattern, typically with a main beam angle of around 15 degrees. The 50% candela trajectory falls between one installation height (MH) on the house side and one installation height on the street side 8.

  • Applications: Most suitable for narrow, elongated areas such as sidewalks, narrow pathways, boundary lighting, and single-lane roads 8.

    Type I light distribution example
  • Type II:

  • Characteristics: Features a narrow asymmetrical pattern with a preferred lateral width of 25 degrees. The 50% candela trajectory falls between one installation height on the street side and 1.75 times the installation height 8. This type is usually suitable for fixtures located on the near side or nearby of relatively narrow roads where the width does not exceed 1.75 times the design installation height 9.

  • Applications: Suitable for 1-2 lane roads, major corridors, highways, wide sidewalks, small side streets, jogging paths, and bike lanes 8.

    Type II light distribution example
  • Type III:

  • Characteristics: Provides a wide asymmetrical pattern, preferably with a lateral width of 40 degrees, designed to project light outward and to the sides. The 50% candela trajectory falls between 1.75 times the installation height and 2.75 times the installation height 8. This type is typically mounted on the side of the area to be illuminated, where the width of the illuminated area should normally be less than 2.75 times the pole height 16.

  • Applications: Often used in major corridors, highways, parking lots, and large open areas requiring broader coverage 8.

    Type III light distribution example
  • Type IV:

  • Characteristics: Exhibits an asymmetrical forward-throw pattern, preferably with a lateral width of 60 degrees, providing strong and uniform lighting over a range from 90 to 270 degrees. The 50% candela trajectory falls between 2.75 times the installation height and 3.75 times the installation height 8. It emits an elliptical light pattern, directing more forward with a narrower width than Type III, making it highly effective in controlling light spillage 8. It is designed for mounting on the sides of wide roads, where the width does not exceed 3.7 times the installation height 9.

  • Applications: Best suited for peripheral applications requiring mounting on walls or poles, such as parking lots, plazas, and building exteriors, where light needs to be primarily directed forward and strict control over backward spillage is necessary 8. It emits light in a semi-circular pattern 21.

    Type IV light distribution example
  • Type V:

  • Characteristics: Produces a completely symmetrical circular light pattern with equal intensities at all lateral angles 4. The 50% candela trajectory is circularly symmetrical around the fixture 8.

  • Applications: Most suitable for illuminating large open areas from a central mounting point, such as parking lots, intersections, parks, and general work or task areas where light needs to be evenly projected in all directions 4.

    Type V light distribution example
  • Type VS:

  • Characteristics: Similar to Type V but produces a symmetric square light pattern with consistent intensities at all lateral angles 4.

  • Applications: Suitable for large areas requiring uniform square illumination, such as parking lots and public squares 9.

    Type VS light distribution example

Table 2: IESNA Lateral Light Distribution Types (I-V/VS)

IESNA Type

Half-Maximum Candela Point Range (in MH, street side/house side)

Preferred Lateral Width (degrees, where applicable)

General Light Distribution Pattern

Major Applications

Type I

1 MH on house side to 1 MH on street side 8

About 15 15

Narrow symmetrical or asymmetrical

Sidewalks, narrow paths, single-lane roads

Type II

1 MH street side to 1.75 MH 8

25 21

Narrow asymmetrical

1-2 lane roads, wide sidewalks, bike lanes

Type III

1.75 MH to 2.75 MH 8

40 16

Wide asymmetrical

Major corridors, highways, parking lots

Type IV

2.75 MH to 3.75 MH 8

60 9

Asymmetrical forward throw

Wall-mounted applications, parking lot peripheries, plazas

Type V

Circularly symmetrical around the fixture 8

No specific angle, 360° symmetrical 21

Circular symmetrical

Parking lots, intersections, large open areas

Type VS

Essentially the same across all lateral angles 14

No specific angle, 360° symmetrical 4

Square symmetrical

Large squares, parking lots

4.3. Vertical Light Distribution Types (Very Short, Short, Medium, Long, Very Long)

These classifications define how light is vertically distributed along the road based on the position of the maximum candela point 8. They are critical for determining appropriate pole spacing and ensuring uniform lighting along roadways.

  • Very Short (VS): Maximum candela point falls between 0 to 1.0 times the installation height along the road 8. Recommended pole spacing is approximately 1 times the installation height 14.

  • Short (S): Maximum candela point falls between 1.0 to 2.25 times the installation height along the road 8. Fixtures with “S” classification are generally suitable for situations where the pole spacing is less than 2.25 times the installation height 8.

  • Medium (M): Maximum candela point falls between 2.25 to 3.75 times the installation height 8. This type is suitable for situations where pole spacing is between 2.25 to 3.75 times the installation height 8.

  • Long (L): Maximum candela point falls between 3.75 to 6.0 times the installation height 8. Fixtures with “L” classification are suitable for larger pole spacing, specifically 3.75 to 6.0 times the installation height 8.

  • Very Long (VL): Maximum candela point falls beyond 6.0 times the installation height 8.

Table 3: IESNA Vertical Light Distribution Types (VS, S, M, L, VL)

IESNA Vertical Type

Maximum Candela Point Range (along the road direction in MH)

Recommended Pole Spacing (MH)

Major Applications/Implications

Very Short (VS)

0 – 1.0 8

1 14

Very small pole spacing

Short (S)

1.0 – 2.25 8

1.0 – 2.25 14

Smaller pole spacing

Medium (M)

2.25 – 3.75 8

2.25 – 3.75 14

Medium pole spacing

Long (L)

3.75 – 6.0 8

3.75 – 6.0 14

Larger pole spacing

Very Long (VL)

> 6.0 8

> 6.0

Very large pole spacing

IESNA lighting concepts overview

While the IESNA classifications are foundational, they serve more as guidelines rather than rigid rules. Their effective application requires consideration of numerous site-specific variables, underscoring the critical role of advanced lighting design tools and expert judgment in achieving optimal illumination. Several resources explicitly state that IESNA types are “guidelines” or “not fixed rules” and are influenced by factors like “fixture mounting height, tilt angle, arm length, and fixture-to-curb distance,” as well as “fixture layout and road conditions” 8. Documents also note the importance of “photometric data” and “modeling” in optimizing light distribution 15. The theoretical light distribution defined by IESNA types can change significantly due to specific installation parameters. For instance, incorrect mounting height or tilt angle may result in insufficient uniformity, excessive glare, or inefficient light distribution, even if the “correct” IESNA type is chosen. This complexity demands detailed photometric analysis and modeling, indicating that effective lighting design is an iterative and intricate process. It is not merely selecting a fixture type from a catalog. Designers must integrate theoretical knowledge (IESNA standards) with practical site conditions, validating their selections through advanced modeling tools. This emphasizes the value of expert lighting professionals in navigating these complexities to provide truly optimized and high-performance lighting solutions.

The IESNA system provides a solid framework for optimizing light coverage and pole spacing through its comprehensive classification of lateral and vertical light distribution. This dual classification directly contributes to improving energy efficiency and safety in roadway lighting projects. IESNA classifies light based on “lateral” (crossing the road, related to road width and coverage) and “vertical” (along the road direction, related to pole spacing) distribution 8. Lateral types (I-V/VS) match road widths (e.g., Type I for single lanes, Type II for double lanes, Type III for highways, Type V for large area lighting). Vertical types (S, M, L) correlate directly with “recommended pole spacing” and “pole height” 8. By precisely defining how light propagates laterally and vertically along the road, IESNA empowers designers to choose fixtures that minimize light overlap (wasting energy) and eliminate dark spots (affecting safety and visual comfort). For instance, opting for “long” vertical distribution can enable larger pole spacings, which can significantly reduce the number of poles and fixtures required for a given segment. This directly impacts initial installation costs and long-term energy consumption 8. Conversely, misjudging vertical distributions may lead to over-lighting or insufficient coverage between poles. The integration of lateral and vertical classifications allows for a highly optimized lighting design that is both functionally effective and resource-efficient. This optimization is crucial for achieving the goals outlined in standards like ANSI/IES RP-8-22, which include “minimizing energy use,” “enhancing driver visual quality,” and “providing high-quality light and increasing the visibility contrast of hazards” 18. It represents a systematic, scientific approach aimed at balancing lighting needs with economic feasibility, safety, and environmental impact.

5. Comparative Analysis and Design Considerations

Effective outdoor lighting design in North America reflects the complex interplay of various classification systems and optical characteristics. Understanding how cutoff fixtures, non-cutoff fixtures, batwing distributions, and IESNA classifications interact is crucial for developing optimal, compliant, and sustainable lighting solutions.

5.1. Interaction Between Cutoff Classifications and IESNA Types

Cutoff classifications (full cutoff, cutoff, semi-cutoff, non-cutoff) primarily control the amount of light emitted above the horizontal plane, serving as key mechanisms for controlling light pollution and glare 1. In contrast, IESNA types (I-V/VS) describe the shape and distribution of light on the ground, determining the effectiveness of illumination in areas such as roads or parking lots 8.

In contemporary North American street lighting, there is an overwhelming emphasis on using full cutoff fixtures. This preference is driven by stringent dark sky initiatives, environmental protection goals, and the desire to minimize light trespass and glare 5. These full cutoff fixtures are subsequently designed with specific IESNA lateral and vertical distributions (for example, full cutoff Type III medium distribution fixtures). The “cutoff” aspect ensures environmental responsibility by preventing light from spilling upwards, while the “IESNA type” ensures light is functionally directed and distributed to the target area (e.g., a multi-lane highway or large parking lot). These two systems work synergistically: cutoff addresses “where light should not go,” while IESNA addresses “where light should go and how it should be distributed.”

5.2. Integration of Batwing Distribution with IESNA Classifications

Batwing distribution itself is neither an IESNA classification nor a cutoff classification. Instead, it is a specialized optical design feature aimed at enhancing the “quality” and “uniformity” of light within the illuminated area 12. Its primary goal is to eliminate hotspots and provide a glare-free, comfortable lighting environment.

Batwing optical elements can be seamlessly integrated into fixtures with various IESNA distributions, particularly those designed for large-area coverage. For example, fixtures creating a symmetrical circular pattern (IESNA Type V) may be equipped with batwing optical elements 9. This combination creates a circular light pattern that is not only symmetrical but also exceptionally uniform without discomforting hotspots, making it highly suitable for areas requiring consistent lighting such as large plazas, central intersections, or open industrial spaces 9. Similarly, it may also be found in Type III distributions 23. This illustrates how batwing can serve as a qualitative enhancement within the quantitative framework of IESNA.

5.3. Comprehensive Considerations for North American Streetlight Projects

The selection of fixtures for streetlight projects in North America is a multidimensional optimization problem that necessitates a holistic approach balancing regulatory compliance (cutoff/BUG), functional requirements (IESNA lateral/vertical), and light quality (batwing, glare control), to achieve optimal safety, efficiency, and environmental management. This is seldom a singular, isolated choice.

  • Energy efficiency: Strategically selecting fixtures with appropriate cutoff classifications (especially full cutoff) and optimized IESNA types directly contributes to energy savings. By directing light precisely to the required areas and minimizing waste (uplight, backlight, spillover), overall energy consumption can be reduced 6. The widespread adoption of LED technology further enhances these efficiencies owing to its inherent design flexibility and higher lumen/watt output 9.

  • Visual comfort and safety: Minimizing glare and ensuring high illumination uniformity is crucial for visual comfort and safety. Proper cutoff fixtures can reduce discomfort glare for drivers and pedestrians, while appropriate IESNA types (potentially enhanced by batwing optical elements) ensure uniform light levels, reducing shadows and improving visibility of hazards 8. This directly correlates with reduced nighttime vehicle accident rates and increased pedestrian safety 18.

  • Dark sky initiatives and environmental impact: Adhering to full cutoff principles as well as guidelines from organizations like DarkSky International 7 and IES Recommended Practices (such as RP-33 Outdoor Environmental Lighting Recommended Practice) 5 is crucial for mitigating skyglow, protecting natural nightscapes, and preserving nocturnal ecosystems. This reflects a growing environmental awareness within lighting design.

  • Regulatory compliance: Local regulations, municipal codes, and state laws across North America often mandate specific cutoff classifications (e.g., full cutoff), and generally recommend or require various outdoor lighting applications to adhere to IESNA types 5. Compliance is not only a legal requirement but also a commitment to responsible urban development.

  • Economic benefits: In addition to environmental and safety advantages, optimized lighting design guided by IESNA standards and cutoff requirements can lead to significant economic benefits. This includes reduced initial installation costs (for example, by optimizing pole spacing with IESNA vertical types 8) as well as reduced long-term operating costs through energy savings 18. Moreover, well-lit areas can enhance public perceptions and potentially attract more foot traffic into commercial districts, boosting economic activity 18.

In practical applications, fixtures must meet multiple requirements: for example, they need to be “full cutoff” to comply with dark sky regulations and minimize light pollution 6; they must possess the appropriate IESNA lateral type (e.g., Type II or Type III) to effectively illuminate roads of specific widths 8; they should have the appropriate IESNA vertical type (e.g., medium or long) for optimal pole spacing along the road, ensuring uniformity and cost-effectiveness 8; and they might need to incorporate batwing optical elements to ensure surface light is evenly distributed without glare, enhancing visual comfort for users 12. Furthermore, all designs must comply with local municipal codes 5. This multifaceted requirement indicates that lighting designers cannot simply isolate one IESNA type. They have to consider the cutoff rating of the fixtures, their internal optical elements (such as batwing), and how these characteristics work together to meet the project’s various functional, environmental, regulatory, and aesthetic objectives. The complexity of finding fixtures that can simultaneously meet all these criteria often necessitates detailed photometric analysis and modeling tools 15. This highlights the critical role of expert consultation and comprehensive design processes in modern outdoor lighting.

6. Conclusion

Outdoor lighting design, particularly in North America, is a complex and nuanced field, centered on a profound understanding of various light distribution concepts. This article elucidates the fundamental distinctions between cutoff fixtures (full cutoff, cutoff, semi-cutoff), non-cutoff fixtures, and the specialized batwing distribution, providing a comprehensive comparison with the authoritative IESNA classification system for roadway lighting.

Cutoff classifications primarily serve as significant mechanisms for controlling light pollution and glare, where full cutoff fixtures represent the most stringent and environmentally friendly standards by directing all light downward. In contrast, non-cutoff fixtures significantly increase light trespass and skyglow due to the lack of such controls, resulting in their use becoming increasingly restricted. Batwing distribution differs from these broader classifications as it is an optical engineering solution focused on achieving exceptional uniformity and visual comfort within the illumination area, typically as a supplement to IESNA types for specific applications requiring hotspot-free lighting.

Ultimately, the best street lighting design in North America is a complex and comprehensive task. It requires integrating the precise, area-based distribution patterns specified by IESNA with strict cutoff requirements and, where appropriate, advanced optical solutions like batwing distribution. This integrated approach not only ensures functional lighting but also maximizes energy efficiency, enhances public safety and visual comfort, and maintains vital dark sky protection initiatives. Guiding the informed selection and professional design of fixtures under these integrated standards and considerations is crucial for creating sustainable, compliant, and high-quality outdoor lighting environments for communities.

Tour d'éclairage solaire mobile portable

Comment choisir la tour d'éclairage solaire à LED avec options d'énergie hybride

Choisir la bonne tour d'éclairage solaire à LED avec options d'énergie hybride

Lors de la sélection d'une tour d'éclairage solaire avec des sources d'énergie mixtes (solaire, éolienne, diesel, réseau), tenez compte des besoins d'éclairage, de la portée, de la fonctionnalité, de la durée de fonctionnement et des conditions spécifiques du site.

Comparaison rapide (trois modèles courants pour le dépistage initial)

  • Petite tour solaire — Hauteur : 6 m ; Couverture : ~750 m² ; Rendement lumineux : ~33 000 lm ; Batterie : ~9,6 kWh ; Autonomie : ~28,8 h (selon la luminosité).
  • Remorque d'éclairage mobile moyenne — Hauteur : 9 m ; Couverture : ~1 500 m² ; Rendement lumineux : ~66 000 lm ; Batterie : ~14,4 kWh ; Autonomie : ~20 h.
  • Grande remorque d'éclairage portable — Hauteur : 12 m ; Couverture : ~2 200 m² ; Rendement lumineux : ~198 000 lm ; Batterie : ~28,8 kWh ; Autonomie : ~20 h.

Remarque : Les durées d'exécution réelles dépendent des réglages de luminosité, de la charge, des conditions météorologiques et des conditions du site. Utilisez les données de test réelles pour une planification précise.

Tour d'éclairage solaire mobile portable

2. Choisissez en fonction de la couverture d'éclairage

Petite tour solaire (6 m / 19 pi) couvre 750 m² ; convient aux petits campings, aux points d'entretien routier, aux postes de contrôle de sécurité, aux entrées, aux postes de signalisation et aux zones de travail individuelles. Si vous avez besoin d'une couverture plus large ou d'une hauteur supérieure, pensez aux tours plus grandes ci-dessous.
Remorque d'éclairage mobile moyenne (9 m / 29 pi) couvre 1 500 m² — idéal pour les chantiers de construction, les secours en cas de catastrophe et les zones minières.
Grande remorque d'éclairage portable (12 m / 39 pi) couvre 2 200 m² — idéal pour les grands événements, les grands chantiers de construction, les interventions en cas de catastrophe, les zones minières et les bases militaires.

3. Choisissez en fonction de la fonctionnalité

  • Surveillance 4G : Optionnel pour la surveillance en temps réel dans les zones peuplées, les chantiers de construction et les emplacements sensibles pour améliorer la sécurité et la protection des actifs.
  • Applications de sauvetage d'urgence : Optez pour des modèles avec recharge hybride et privilégiez l’unité de plus grande capacité pour maximiser l’autonomie et la luminosité en cas de catastrophe.
  • Type de batterie : Les batteries au plomb-acide sont généralement choisies pour la sécurité sur les chantiers extérieurs où le lithium présente des risques d'incendie dans des environnements instables ; des options LiFePO4 sont également disponibles avec des mesures de sécurité appropriées.
  • Capacité de la station de base 5G : Utile pour les régions éloignées ou à signal faible, étendant la connectivité là où c'est nécessaire.

4. Luminosité et efficacité énergétique

  • Niveaux de luminosité se déclinent généralement en trois niveaux :
    • 33 000 lm — adapté aux petits sites et aux zones de travail à faible densité.
    • 66 000 lm — adapté aux zones de travail de taille moyenne et aux besoins de sécurité.
    • 198 000 lm — pour les environnements de haute sécurité ou les opérations à grande échelle nécessitant une large visibilité.
  • Conseils d'utilisation : Pour les petits sites, une luminosité plus faible est souvent suffisante ; pour les sites plus grands ou une sécurité plus élevée, une luminosité plus élevée est préférable.
  • Efficacité énergétique : Privilégiez une efficacité des luminaires supérieure à 150 lm/W pour réduire les coûts d’exploitation à long terme.

5. Température de couleur et rendu

  • Choix de température de couleur : 5 000–6 500 K (blanc froid) pour les zones de travail et les opérations d’urgence ; 2 700–3 000 K (blanc chaud) pour les zones de repos ou de sécurité où le confort est important.
  • Rendu des couleurs (IRC) : Un IRC plus élevé (> 80) permet de distinguer les couleurs et les détails dans les environnements critiques tels que les interventions d'urgence, l'exploitation minière, la construction, le camping, les points de contrôle de sécurité, les stations de signalisation et les zones de sécurité.
  • Efficacité: Les luminaires LED à haute efficacité favorisent les économies d’énergie au fil du temps.

Pour des raisons de respect de l'environnement et de performance, pensez aux tours à énergie hybride qui basculent automatiquement entre les sources solaires, éoliennes, diesel et réseau pour maintenir l'éclairage dans des conditions variables.

Comprendre les différentes tours d'éclairage solaire hybrides

Tour d'éclairage solaire uniquement

Tour d'éclairage solaire mobile portable

Avantages : Respectueux de l'environnement, faibles coûts d'exploitation, entretien simple.

  • Caractéristiques : rotation à 360° et éclairage
  • Temps de travail : jusqu'à 35 heures

Applications typiques : Régions ensoleillées, adaptées aux besoins d'éclairage temporaires ou à long terme.

Modèles représentatifs :
Tour d'éclairage solaire (mobile),
Tour d'éclairage solaire (variante 2).

Tour d'éclairage hybride éolienne et solaire

Les remorques solaires hybrides Sun+Wind associent panneaux solaires et éoliennes pour créer une solution énergétique polyvalente. Ce système garantit une production d'électricité fiable quelles que soient les conditions météorologiques, ce qui le rend idéal pour les zones reculées. L'approche hybride réduit la dépendance au carburant, diminue les coûts d'exploitation et minimise l'impact environnemental en diminuant les émissions de carbone. Portables et faciles à déployer, ces remorques sont idéales pour les chantiers, les événements et les besoins énergétiques d'urgence.

Avantages : Fournit une énergie stable dans les régions riches en vent.

  • Caractéristiques : Jusqu'à 80 heures d'autonomie
  • Applications typiques : zones reculées, sites dotés de ressources éoliennes abondantes, éclairage de secours après catastrophes

Modèles représentatifs :
Systèmes solaires hybrides soleil-vent et
Générateur solaire mobile Sunwind.

Tour de générateur hybride diesel et solaire

Remorques solaires hybrides Sun + Diesel

Avantages : Approvisionnement énergétique stable dans les zones sans accès au réseau.

  • Caractéristiques : Jusqu'à 80 heures d'autonomie
  • Applications typiques : Construction à distance, sauvetage en montagne, points logistiques d'événements majeurs

Modèle représentatif :
Véhicules hybrides solaires Sundiesel.

Tour d'éclairage alimentée par le réseau

Tour d'éclairage mobile électrique

Avantages : Approvisionnement énergétique stable là où les réseaux électriques existent.

  • Efficacité : 195 lm/W d'efficacité du luminaire
  • Surface éclairée : 1 200 m²
  • Temps de travail : 35 heures
  • Applications typiques : grands chantiers de construction, emplacements d'infrastructures urbaines, lieux d'événements

Modèle représentatif :
Tour d'éclairage mobile électrique (T300, 6 m).

Tableau de sélection de référence rapide

ModèleHauteurZone de couvertureSortie de la lumièreCapacité de la batterieDurée d'exécution (typique)Options énergétiques
Petite tour solaire6 m750 m²33 000 lm9,6 kWh~28,8 hSolaire, hybride, diesel, réseau (en option)
Remorque légère mobile moyenne9 m1 500 m²66 000 lm14,4 kWh~20 hSolaire, hybride, diesel, réseau (en option)
Grande remorque légère portable12 m2 200 m²198 000 lm28,8 kWh~20 hSolaire, hybride, diesel, réseau (en option)

Autres considérations

Maintenance et entretien

  • Inspection régulière des luminaires et des batteries
  • Nettoyer les panneaux photovoltaïques pour maintenir les performances du système
  • Assurer la fiabilité globale du système grâce à des contrôles de routine

Adaptabilité environnementale

  • Indice de protection : Choisissez des luminaires avec un indice de protection élevé (par exemple, IP65) pour résister aux conditions météorologiques difficiles

Budget et coût total

  • Tenez compte des coûts initiaux de l’équipement, de l’installation et de la maintenance continue pour obtenir un véritable coût total de possession.

Les tours d'éclairage solaires portables Luxman utilisent des panneaux solaires à haut rendement, des batteries au lithium longue durée et des luminaires LED haute luminosité pour garantir une performance stable et durable. Luxman propose également des modèles hybrides (par exemple, solaire + éolien, solaire + diesel) pour répondre à divers environnements et exigences.

En suivant ces directives, vous pouvez sélectionner la tour d'éclairage solaire portable Luxman qui correspond le mieux à vos besoins et garantir un éclairage fiable et des performances à long terme.

Prêt à trouver le modèle parfait pour votre site ? Contactez Luxman dès aujourd'hui pour une solution sur mesure.


https://luxmanlight.com/street-light-distribution-analysis-how-to-meet-your-road-lighting-standards/

Analyse de la distribution de l’éclairage public – Comment respecter vos normes d’éclairage routier !

Il s’agit d’une exigence pour conception de lampadaire routier.

Nom de l'articleCode de l'itinéraireLargeur de la route (m)Type de surfaceConfiguration de la lampeNombre de lampesHauteur de la lampe (m)Espacement des lampes (m)Angle (°)Longueur du bras de la lampe (m)Distance entre le lampadaire et la route (m)Éclairement (1 m)
Route 1M57 mCIE C2 (humidité calculée)Lampe unilatérale0.81240000.758000
Route 2M314 mCIE C2 (humidité calculée)Lampe bilatérale0.81040000.758000

Maintenant, sur la base des conditions ci-dessus, nous devons sélectionner la distribution lumineuse des lampes et la vérifier.

Commençons par analyser l’état de la route.

Pour la route 1, avec une largeur de route de 7 m, il devrait s'agir d'une route à deux voies avec des dispositions de lampadaires unilatéraux, un espacement des poteaux de 40 m et une hauteur de poteau de 7,5 m.

Pour la route 2, avec une largeur de route de 14 m, il devrait s'agir d'une route à quatre voies bidirectionnelle avec des dispositions de feux bilatéraux, un espacement des poteaux de 40 m et une hauteur de poteau de 9 m.

Sur la base de ces conditions routières, nous procédons à la sélection de la distribution lumineuse, en nous référant à la catégorisation des lampadaires de l'IESNA.

Classification des lampadaires IESNA

↑ Classification des lampadaires IESNA, Manuel d'éclairage nord-américain, 10e édition

Pour les routes à une ou deux voies, nous choisissons généralement des lampadaires de type II. Le type I convient aux chemins et trottoirs, tandis que le type III s'applique aux autoroutes principales.

Nous pouvons nous référer aux règles suivantes en fonction de la largeur de la route.

Guidage de la répartition lumineuse sur la largeur de la route

Conformément au tableau ci-dessus, nous devons sélectionner la distribution de type II L. Cependant, compte tenu de la distance de 0,75 m entre la lampe et la route, telle que spécifiée dans les conditions routières, nous ajusterons légèrement l'espacement des poteaux et choisirons une distribution de type II M ou S.

Test de distribution de la lumière de type II

Commençons par tester la Route 1 en définissant les conditions de route dans DIALux evo (nous évitons DIALux4.13 car il ne prend pas en charge la norme EN13201:2015 nécessaire à la sélection de la nouvelle norme).

Réglage de route DIALux evo

Ici, nous devons sélectionner le type de surface CIE C2 et cocher l'option de calcul des surfaces de route mouillées, en choisissant W1.

La surface CIE C2 correspond à l'asphalte, avec une réflectivité similaire à celle de notre revêtement R3 traditionnel. Des explications plus détaillées sur les codes sont fournies ci-dessous :

Codes de type de surface CIE C2

Une fois les conditions de route définies, nous pouvons sélectionner la distribution lumineuse pour les calculs de vérification.

Nous allons sélectionner une distribution de type II S pour la vérification.

Configuration de distribution de type II S

Définissez les conditions de disposition de la lampe et configurez le flux lumineux de la lampe sur les 5 500 lm requis.

Paramètres de configuration de la lampe

Résultats de la vérification

Résultats de vérification pour la distribution S de type II

Les résultats n'étaient pas satisfaisants ; l'uniformité de la luminosité de la route était inférieure à la norme requise de 0,5 cd/m². Cependant, les valeurs Uo, Uow et Ul dépassaient largement les valeurs standard.

On peut conclure que la distribution est peut-être légèrement inadéquate, mais où se situe exactement son défaut ? Il faut analyser la grille de calcul de la luminosité.

Analyse de la grille de calcul de la luminosité

En analysant la grille de calcul ci-dessus, nous avons trouvé la valeur minimale, plus basse entre les deux mâts. Cela indique que la distribution lumineuse doit être renforcée aux deux extrémités ; nous choisirons donc directement la distribution de type II M pour nos calculs.

Passage à la distribution M de type II

Paramètres de distribution de type II M

Résultats de la vérification

Résultats pour la distribution M de type II

Les résultats sont tous satisfaisants, indiquant que cette distribution lumineuse peut répondre aux exigences des clients sous le flux lumineux spécifié de 5 500 lm.

Ensuite, regardons la Route 2 et définissons les conditions de la route : une route à quatre voies, bidirectionnelle, norme M4, surface mouillée calculée.

Configuration des conditions de la route 2

Les conditions routières de la Route 2 sont essentiellement les mêmes que celles de la Route 1, sauf qu'il s'agit d'une route bidirectionnelle à quatre voies avec des dispositifs de feux bilatéraux, améliorés d'un niveau.

Nous choisirons à nouveau la distribution de type II M pour l'agencement.

Distribution de type II M pour la route 2

Résultats de la vérification

Résultats de la validation de la Route 2

Les deux parties ont rempli les conditions, indiquant que cette distribution peut satisfaire les exigences du client dans le cadre du flux lumineux spécifié de 6 500 lm.

Grâce à cette analyse, il est évident qu’il existe des modèles à suivre lors de la sélection de la distribution lumineuse pour éclairage publicQu'il s'agisse de choisir des produits existants ou de développer de nouvelles distributions, on peut concevoir selon ces règles, puis identifier les défauts grâce aux résultats de calcul, en apportant des modifications ciblées en conséquence.